Welcome to the WRF in the Cloud Online tutorial.
This tutorial will introduce the steps for running WRF in the cloud, using the Scala Computing platform.
The instructions given are meant to be used as a guide. Users must have their own account established with Scala Computing in order to follow these instructions. If interested in establishing a Scala account, please contact the Scala sales team.
Creating a WRF Development Environment
The Scala Compute Platform provides a WRF-specific development environment, which is a cloud instance, and allows for multi-node (cluster) configurations. The development environment contains all pre-installed WRF binaries and libraries necessary for running the model.
- Navigate to the Scala Computing website and login to your account.
- Click on the "DEV PLATFORMS" link in the left-hand navigation bar.
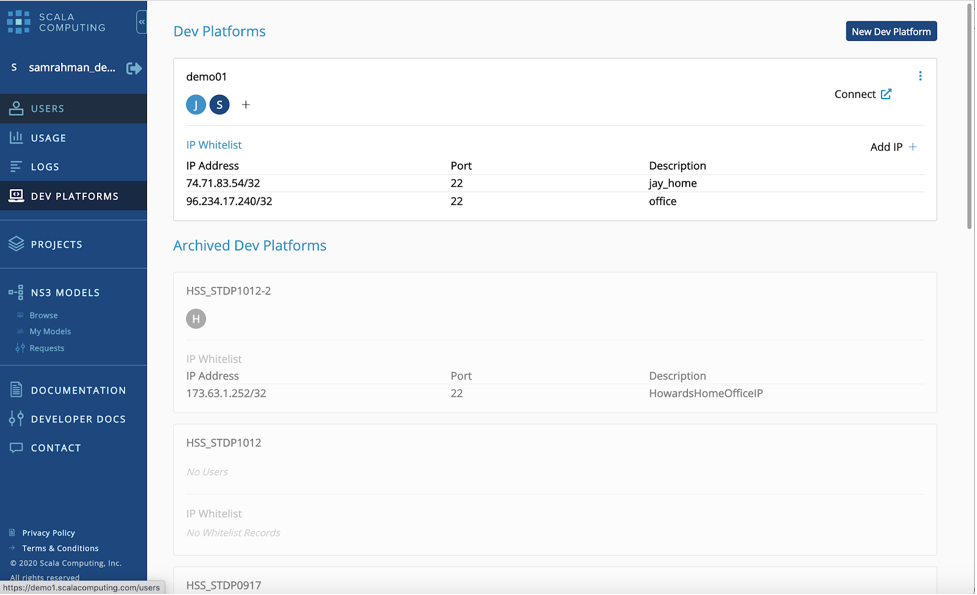
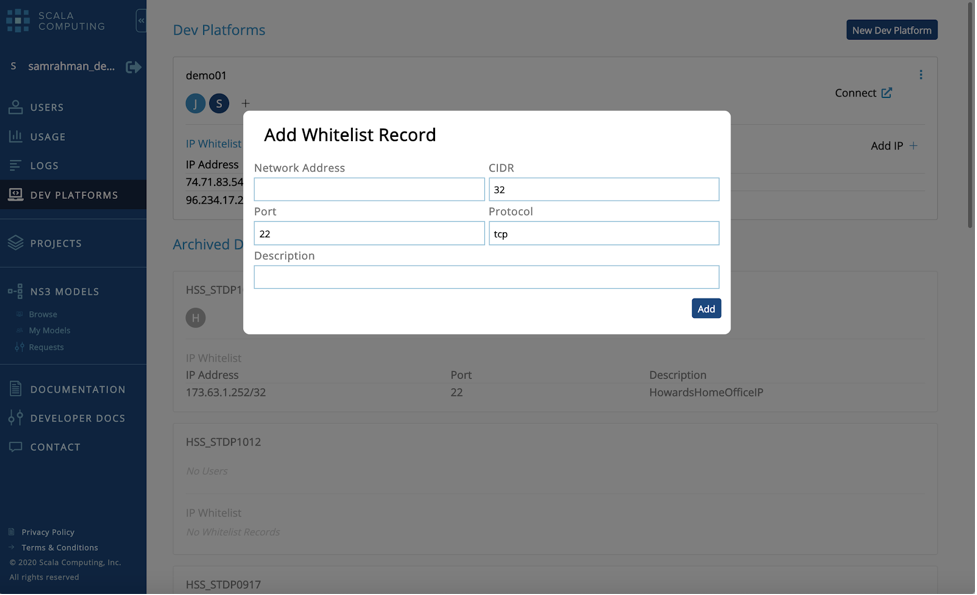
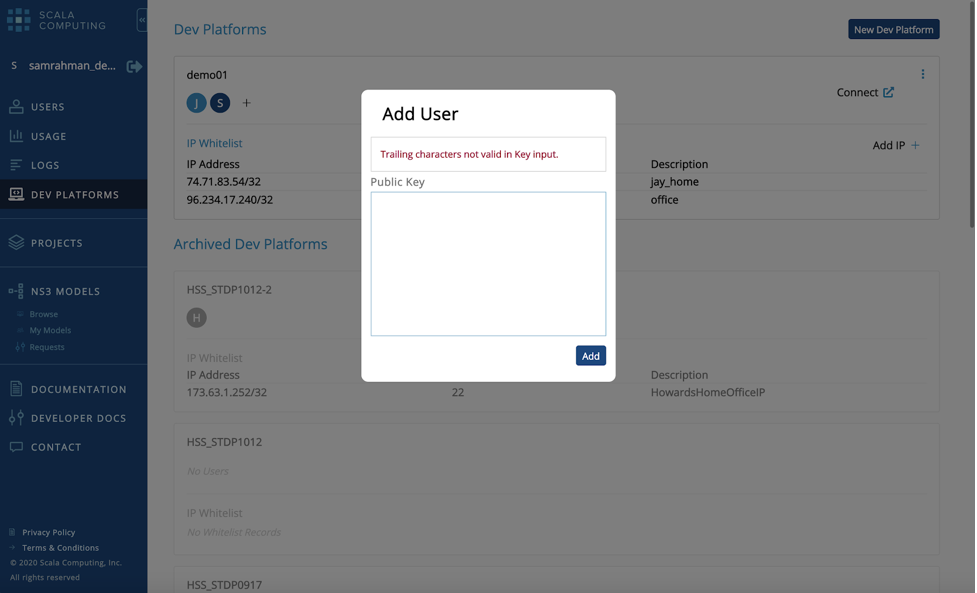
- Next you will need to whitelist your machines IP address and add your SSH public key so you can connect to the development environment.
- You then click on the "Connect" button to get the SSH command.
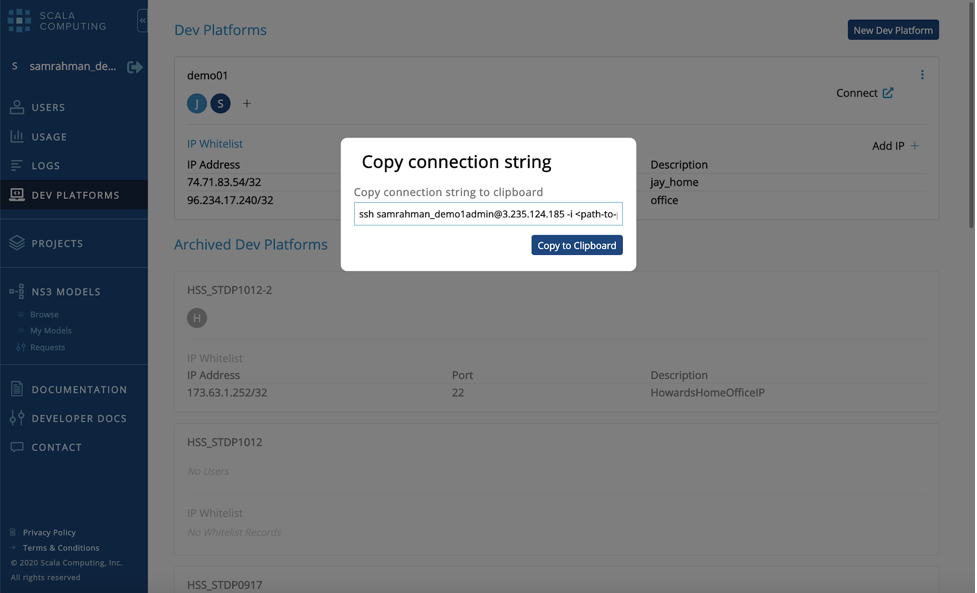
*Note: You may want to save this command somewhere so that you can simply paste it in the command line next time you want to access your environment.
-
Open a terminal/Unix window from your local machine, and in the command line, paste the connection string you were given in step 4, above.
- When you get into your instance, you will be in the /home/centos directory.
Navigate to the "work" directory.
cd work
-
There will be a script called "example_run.sh". This is the batch script that will submit job to run the WPS and WRF executables. This script can be modified to cater to any changes you make to your environment.
If WRF & WPS are not already built in your instance workspace, they will need to be compiled, along with the necessary libraries. You can follow this Compiling Tutorial to get everything installed correctly.
- Before running, you will need to make sure the following are all in configured for your particular simulation:
- namelist.wps
- namelist.input
- Meteorological input data in place (see example_run.sh for proper location)
- Geographic static data in place (see example_run.sh for proper location; modify path in namelist.wps)
-
To submit the simulation, type the following into the command line:
sbatch example_run.sh
To check for submission status, use the command
squeue
Scala Auto Cluster
The Scala Compute Platform introduces a feature that simplifies cluster deployment on the cloud.
By including a few new configuration attributes to your sbatch script, you can configure your cluster, and the Scala Compute Platform will take care of reconfiguring Slurm and launching the cluster.
- Below is an example sbatch script that uses the new attributes.
#!/bin/bash
#SBATCH -J wrf_real
#SBATCH -N 1
#SBATCH --partition wrfpartition
#SBATCH --requeue
#SBATCH --dependency singleton
#SCALA --mincpus 4
#SCALA --mem-per-cpu 4
- Below the sbatch attributes are a set of Scala attributes that allow you to define a cluster. You can define the number of cores you need as well as the memory per core.
Number of cores
#SCALA --mincpus 4
Memory per core:
#SCALA --mem-per-cpu 4
You can also override these values with a cloud- specific instance type if you want to be very precise.
#SCALA --cloudInstanceType aws.c5.2xlarge
-
Typically you submit a job to slurm with the following command.
sbatch mysbatchscript.sh
However, when using the Scala Compute Platform you must submit job with the scala command, as follows:
scala sbatch mysbatchscript.sh
After you run this command, you can run squeue to see that your job is queued–up while waiting for the cluster to start. Once the cluster starts(typically within 2-3 minutes), your job will automatically start running.
Running a Simulation
The cluster is using the same AMI (Virtual Image) as the sandbox, which means the environments are the same. Any command that works on your sandbox also works on the cluster. Users can find some helpful scripts under the /results/work/scripts folder.
Configuring Environment
Scala uses a module system to load the environment. To list list available modules, type
module avail
And use "module load xxx" to load the appropriate libraries for WRF.
module load netcdf/netcdf-c-4.7.4
module load grib/grib2
module load netcdf-fortran/netcdf-fortran-4.5.3
module load mpi/mpich-3.3.2
Scala recommends setting the stack limit to "unlimited" to avoid a segmentation fault.
ulimit -s unlimited
Defining the Scala Workspace
Scala provides two high performance network file systems "out-of-the-box," which are automatically attached to all sandbox and cluster instances.
-
"shareddata" contains generic and read-only data for WRF, such as static geographic data. Users can find the preloaded geographical data under the /shareddata/geog folder.
-
Scala recommends using the "results" folder as the working space, which includes examples and precompiled binaries in the /result folder.
Running WPS
After obtaining the meteorological input data, go into the WPS ($WPS_BIN) working folder, and tailor the namelist.wps to your specific case. After this, Rrunning WPS is as easy as executing the following steps.
*Note the below example is specific to GFS/FNL input data. You must use the data and Vtable that corresponds to your particular data
cd $WPS_BIN
./geogrid.exe
ln -sf ungrib/Variable_Tables/Vtable.GFS Vtable
./link_grib.csh $wps_data/fnl*
./ungrib.exe
./metgrid.exe
Running WRF
Once the WPS program completes, move into the WRF running directory ($WRF_BIN). Link in the met_em.d0* files from WPS, and then run the real and wrf executables.
cd $WRF_BIN
ln -sf $WPS_BIN/met_em.d01* .
mpirun -n 2 ./real.exe
mpirun -n 2 ./wrf.exe