A 2-way nested run is a run in which multiple domains at different resolutions are run simultaneously and communicate with each other (the coarser domain provides boundary values for the nest, and the nest feeds its calculation back to the coarse domain – if feedback is turned on, i.e., =1 ).
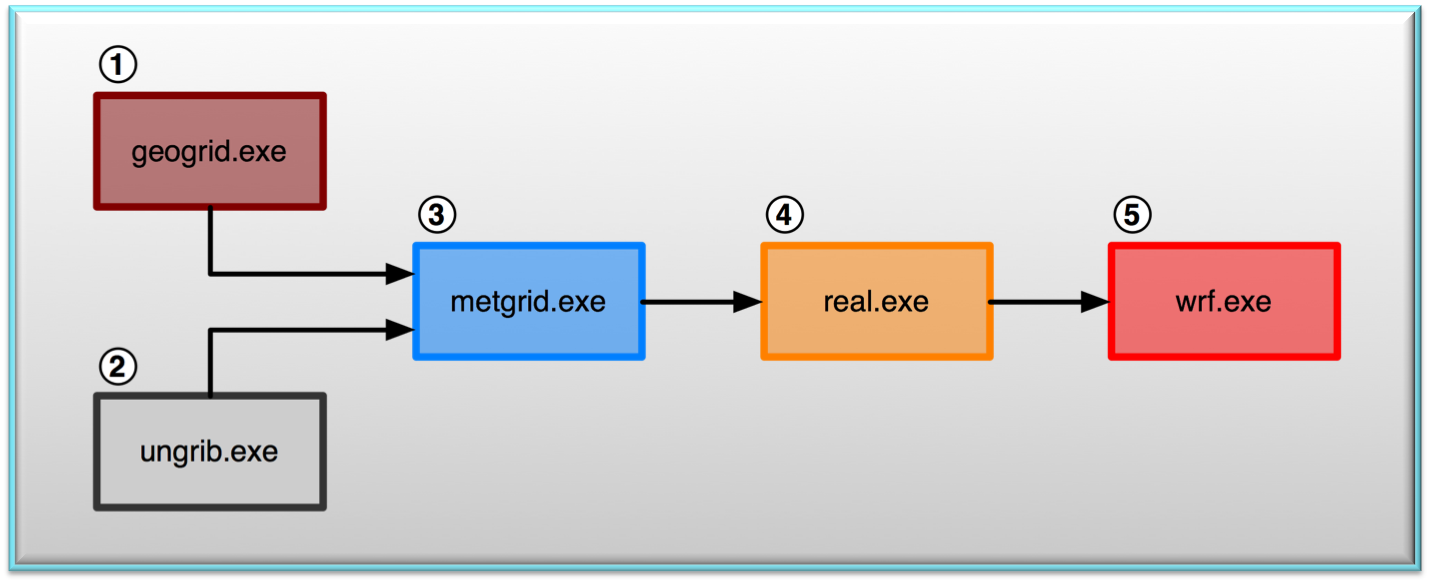
For this run we are going to have 1 coarse domain, and 1 finer-resolution domain. We will need to repeat steps 1, 3, 4, and 5. We do not need to repeat step 2, as we have already ungribbed the data for the Single Domain Run. If you no longer have this data, go back to the Single Domain Run and repeat step 2.
Recall that the geogrid program defines the map projection, and the geographic location, size, and resolution of the domain. It also interpolates static fields (e.g., topography height, landuse category, etc.) to the domain.
- Make sure you are in the WPS directory.
- Edit namelist.wps to configure the simulation domain. Pay attention to the BOLD modifications in the box below.
Note::
For a nested domain, the only namelist variables that need to be modified are those that, by default, have multiple columns (each column represents a different domain). If the default namelist only has a single value, then the model only expects a single value. Adding additional columns will cause a running error.
- Before running geogrid.exe - let us run the plotgrids program to make sure the domain is correct.
ncl util/plotgrids.ncl
You will see the following plot appear on the screen:
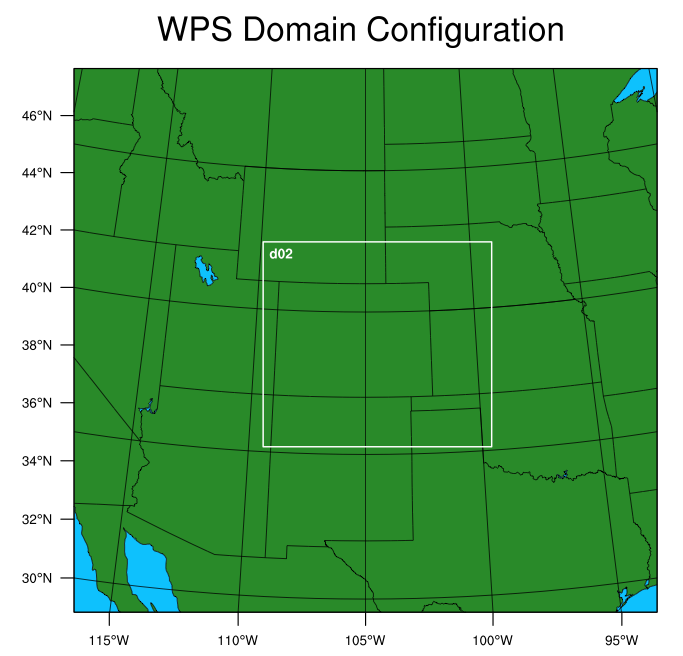
To close the X11 display window, simply type 'ctrl-c'.
- Now generate
geographical data files "geo_em.d01.nc" and "geo_em.d02.nc" by running program geogrid.exe
Recall that the metgrid program horizontally interpolates meteorological data (extracted by the ungrib program) to the simulation domains (defined by geogrid). This program will create the input data files necessary to run the WRF model.
- Before you run metgrid.exe, make sure that the dates in namelist.wps are set correctly for DOMAIN 2. Pay attention to the BOLD modifications in the box below.
Note:
End_date for domain 2 is equal to the start date, as only the initial time is required for this domain.
- Now run the program "metgrid.exe"
This will create a number of files (note the single extra domain 2 file now being created):
- Try the netcdf data browser 'ncview' to quickly
examine your data files from metgrid.
Recall that the real program uses the horizontally-interpolated meteorological data (met_em* files from WPS) and vertically interpolates them for use with the WRF model. It creates initial condition files and a lateral boundary file that will be used by WRF.
- Link the metgrid output data
files from WPS to the current directory:
- Run real.exe
to produce model initial and lateral boundary files.
If successful,
the following input files for wrf will be created (Note: a wrfbdy_d02 file will not be created, as the nest will always gets its boundary conditions from the mother domain):
wrfbdy_d01
wrfinput_d01
wrfinput_d02
View the log files to ensure the run was successful.
Recall that the WRF model uses the intitial and boundary condition files generated by the real program to perform model integration, using user-specified options provided in the namelist.input file (e.g., physics options).