Welcome to the WRF in the Cloud Online tutorial.
This tutorial will introduce the steps for running WRF in the cloud, using the Amazon Web Services (AWS) platform.
The instructions given are meant to be used as a guide. Users must have their own account established with AWS, with their own user name and login in order to follow these instructions. If interested in obtaining an AWS account, visit the Amazon Web Services (AWS) website. You may also search to see if your institution an Active AWS Academy Member. If so, you may want to contact the institution's research computing team to see if you may have access through that account.
Click on a tab below for quick navigation.
**Click on instructions below to expand or collapse sections**
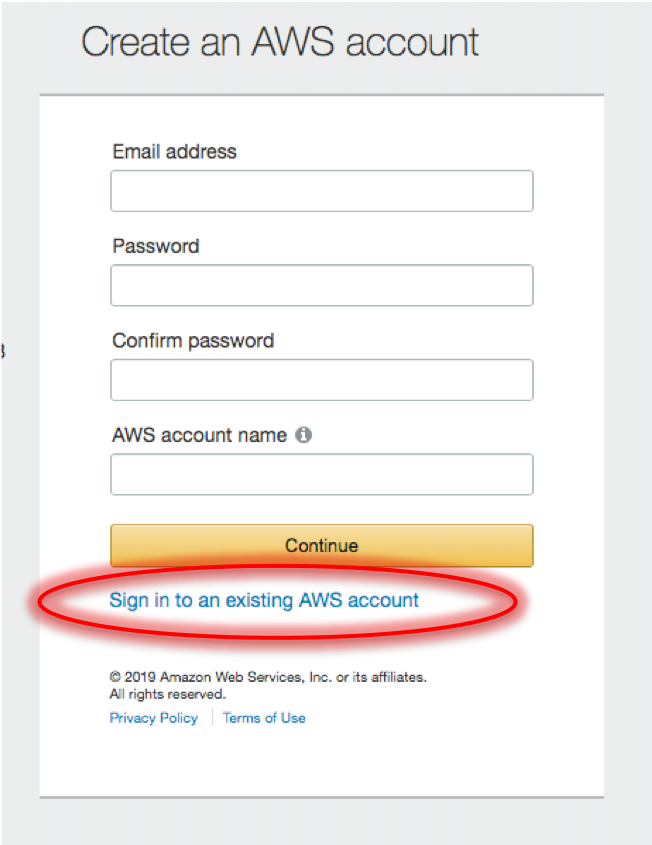
Click on the orange button in the top right corner of the page (it will say either "Create an AWS Account" or "Sign in to the Console").
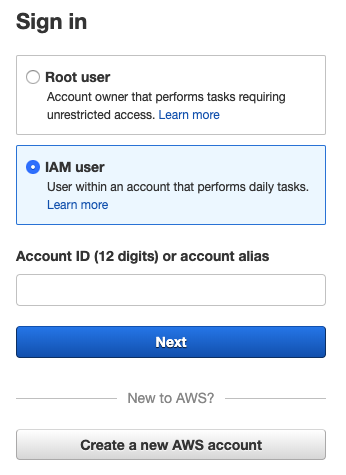
You should see a sign-in box like one of the two below:
If your sign-in looks like the image on the right, assuming you already have an AWS account, click on "Sign in to an existing AWS account." You will then be given a sign-in box like that on the left, where you will enter your Account ID or Alias.
If your sign-in looks like the one on the left, assuming you already have an AWS account, simply enter your Account ID or Alias.
From the next page, enter your password.
You are now logged-in to the AWS Cloud Computing Console.
Continue to Step 2 below.
2.
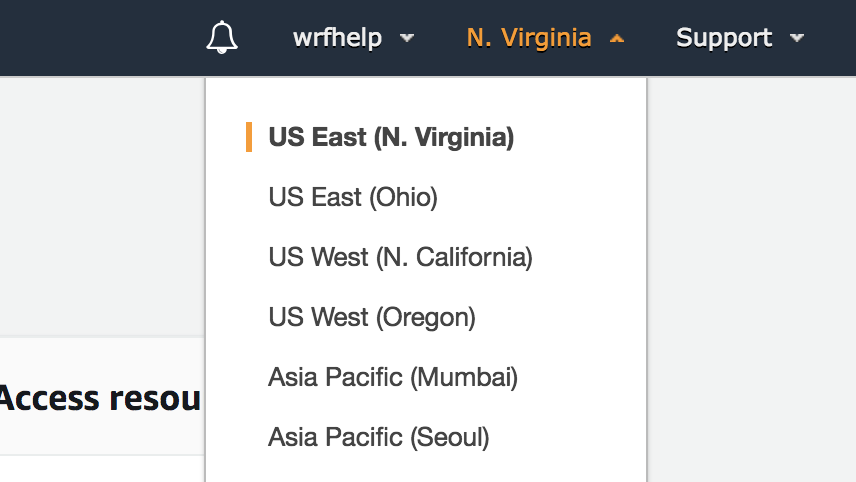
Check the top right corner to determine your region. To be able to use the pre-configured environment for this tutorial, you need to be in the "US East (N. Virginia)" region. If you are in a different region, use the drop-down box to change the region to "US East (N. Virginia)."
Note:
If your browser is not wide enough, you may need to scroll over a bit to see this.
3.
Click the "Services" tab at the top. Under the "Compute" section, select "EC2".
4.
For this application, we have built an environment that is functional for running a simple WRF case, along with all of its components. We made a snapshot of that environment and have made it available for you. This snapshot is called an Amazon Machine Image (AMI).
On the left side bar, click "AMIs", which is located in the IMAGES section.
Note:
An Amazon Machine Image (AMI) is a snapshot or image of a preconfigured environment.
Look for the following AMI listing: AMI Name:CloudWRF_AMI (for webpage) AMI ID: ami-0815f1678f4949559
This particular image comes with WPS and WRF pre-compiled and includes some input data, the geographic static data (for running geogrid), and some post-processors. Click the box to the left of the AMI listing to select the image, then click the blue "Launch" button at the top of the page to choose this AMI as your environment base.
Note:
If you are interested in using an image with all pre-compiled WRF code, Versions 4.0 and later of WRF, use this AMIi.
AMI Name:wrfv4_wpsv4_gnu AMI ID:ami-0041e40831eedc4f2
5.
To choose the type of instance you wish to use, scroll down and click the square to the left of your choice, which will highlight it in blue. For this tutorial select: c4.4xlarge
Note:
AWS supplies several types of servers. The c4.4xlarge is basic, but offers a reasonable size and speed for running a basic test WRF simulation. This particular instance type has 16 virtual CPUs, which equates to 8 actual CPUs.
To proceed, at the bottom of the page click on the "Next: Configure Instance Details" button.
6.
Here you are going to add a personal tag. This can be helpful for identifying your instance later. You can use whatever name you would like that you will recognize, and is unlikely to be used by anyone else using your same account.
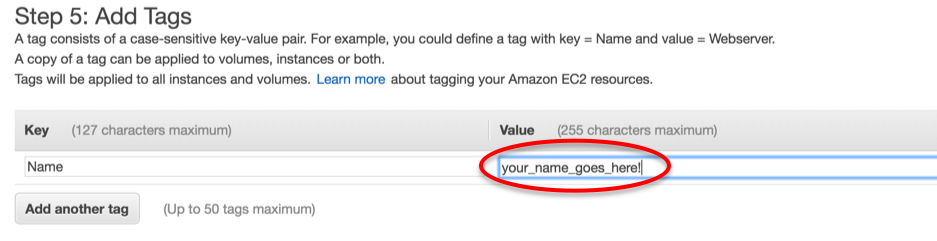
At the top of the page, click "5. Add Tags," and on the next page, click the link "Click to add a Name tag" (as shown below)
Next you will enter the name tag you've chosen to personalize your instance. Make sure to enter the name in the space under the header "Value", which is circled in red below!
Note: Do not include any spaces in your name. Use underscores to provide space between words or elements of the tag.
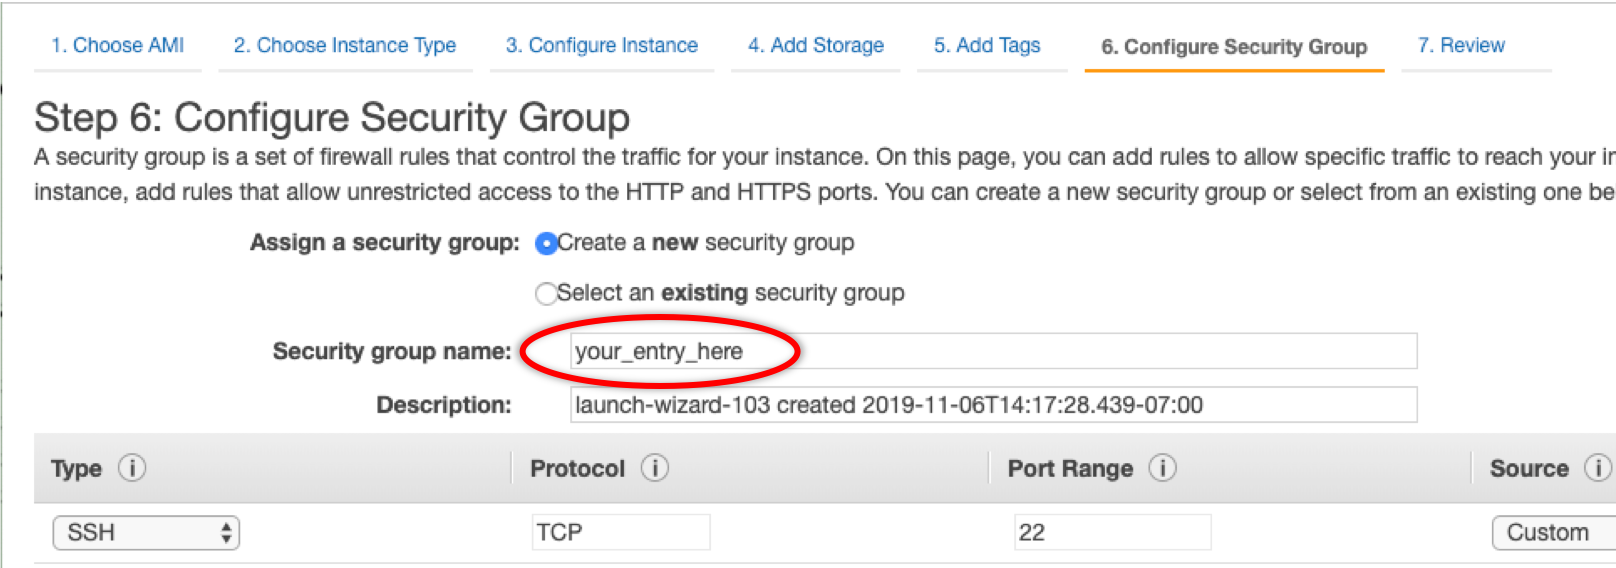
Finally, there can sometimes be a problem when multiple instances are launched with the same account. To avoid errors, we need to change our Security Group Name. In the lower right corner of the "Add Tags" page, click "Next: Configure Security Group."
In the "Security Group Name" space highlighted in red below, type in a name of your choosing (again, do not include spaces – use underscores if needed to differentiate words or elements).
After you do this, click the blue "Launch" button at the bottom of the page.
Note:
You may see warnings at the top of the next page. You can ignore those for now.
7.
From the "Review Instance Launch" page, click the blue "Launch" button at the bottom. Upon clicking, a pop–up window will appear with header "Select an existing key pair or create a new key pair."/li>
At this point, you'll need to create an ssh key pair. This will allow you SSH access into your instance. From the first drop-down box, choose "Create a new key pair. " Then choose any name you'd like and type it in the "key pair name" space, but make sure to not include any spaces. Then click "Download Key Pair." The key pair will be placed in your local "Downloads" directory, named:
your_key_pair_name.pem
**Note: Some systems will add .txt at the end of the *.pem file name. So your file may actually be named "your_key_pair_name.pem.txt."
Once you have completed the above steps, click "Launch Instances", and then click the blue "View Instances" on the next page.
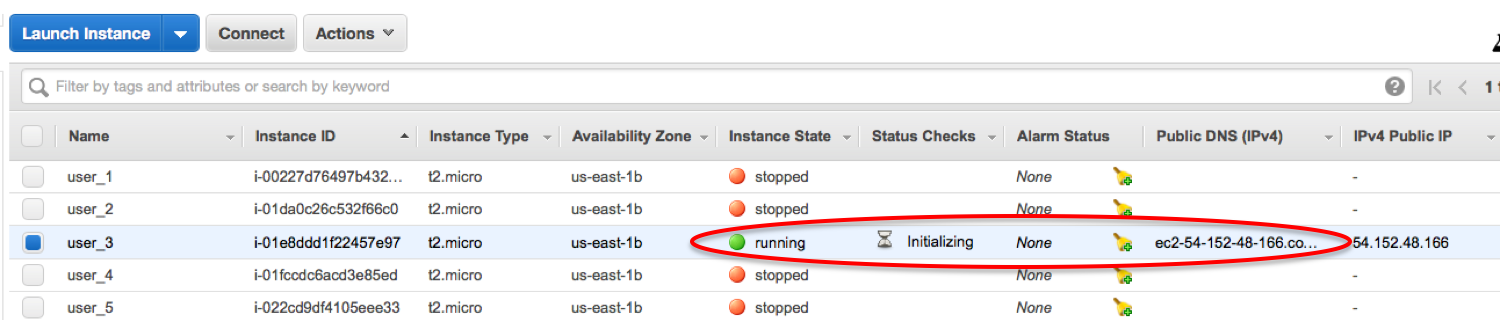
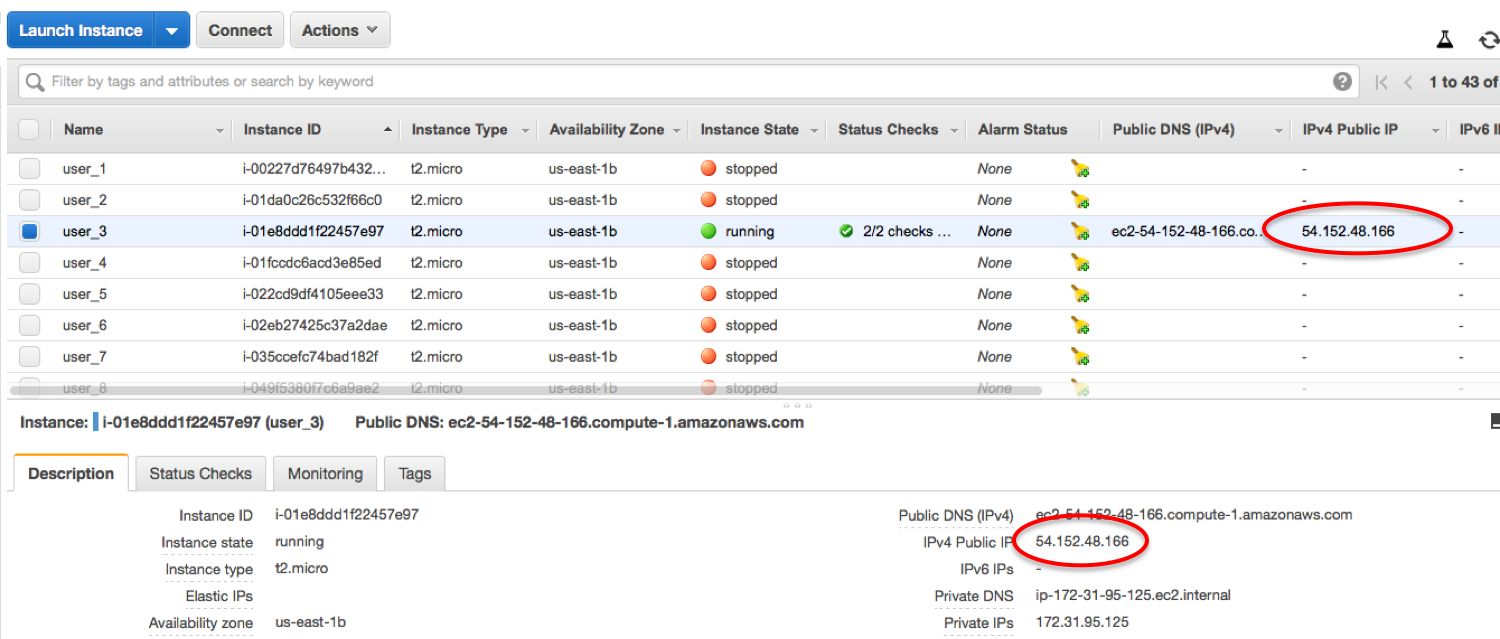
Look for the instance with the tag you created in Step 6. As soon as you see a green dot and "Running" under the "Instance State" column, your instance is ready to use!
Continue below to learn about obtaining remote access to your instance.
**Note: You will need to obtain the "IPV4_public_IP" from the AWS "Active Instances" web page. This is the IP address of your instance's virtual machine at AWS. As is shown below, this appears in 2 locations on the page. Note that you may need to scroll to the right on your browswer to see the IP address.
The IPV4 Public IP is unique to your particular instance. If you were to stop or restart, your instance, this public IP would be different each time.
From this point on, you'll mostly be working in your terminal window. You may occasionally need to look back at the AWS web page, so make sure to keep that open on your desktop!
Continue below to learn about your instance environment.
Once you are in your instance from the terminal window, you should see the following set-up:
Because this is a pre-configured image, the environment has been set up with the necessary WRF system accessible libraries, and all the code has been compiled for you. Below is a description of the directories:
input_data: Contains input first–guess data for running WPS. The data correspond to the cases available to run.
libraries: Contains all the libraries necessary to build WRF, WPS, and graphics utilities on this system. You should not need to do anything in this directory.
running: Contains additional directories for WPS and WRF compiled source code (e.g., WRFV4.1.1 and WPSV4.1), along with a compiled version of WRF built with the vortex–following capability. This is where you will run WPS and WRF for the cases provided.
scripts: Contains various scripts used to build or run different things. You should not need to do anything with these.
tar_files: Contains several tar files that were used to build the environment. From here you can find tar files of the source code, as well as for the precompiled code. So if you happen to need a new, clean compiled version of the code, you can copy it from here and then unpack it.
WPS_GEOG: A directory that contains all of the geographical static data necessary to run the geogrid program.
2.
From the terminal window on your LOCAL machine, go to the directory containing the file you want to transfer, or where you want to locally store a file from your AWS instance.
*Note: If you are transferring multiple files at a time, first you will need to package the files into a single .tar file, as follows:
tar -cf my_files.tar my_files*
On your local machine, to copy files from your INSTANCE to your LOCAL machine:
Warning:
Transferring files from AWS to another system will result in data egress charges to the account. Small files do not cost much, but if these are larger files, or many files, make sure it is absolutely necessary before doing this.
3.
When you are done using your image, you must stop or terminate the run so that you will not continue to accrue charges for your computing time. There are 3 options to do this:
STOP: This option is similar to a 'pause.' All the work you have generated will remain in the same state in your instance until you are ready to use it again. To stop the instance, click on the 'Actions' button at the top ->Instance State ->Stop. When you are ready to run it again, click the same action button ->Instance State ->Start
TERMINATE: This option kills the instance and it is not able to be opened again. It's similar to deleting a directory. To do so, click on the 'Actions' button at the top ->Instance State ->Terminate.
Create an AMI: This option is discussed below, after the following section on running WPS/WRF.
Note: If at any time you prefer to have more than one terminal window open to your instance, that is perfectly fine. Simply ssh into the instance from multiple terminal windows to achieve this.
You are now ready to run WPS and WRF. Now that you are in a Unix environment, this can be done just as for a non–cloud WRF run. Both namelist.wps and namelist.input are configured to run as-is for a small single-domain case, but you are welcome to play around with the settings if you wish.
The below exercise assumes experience with WRF. If you are new to WRF, you likely will want to try this exercise first, to get more explanation about what you are doing.
1.
Start by navigating into the WPS directory, which is /home/ec2-user/running/WPS. Next run geogrid. WPS is compiled serially, so you will use the following command:
./geogrid.exe
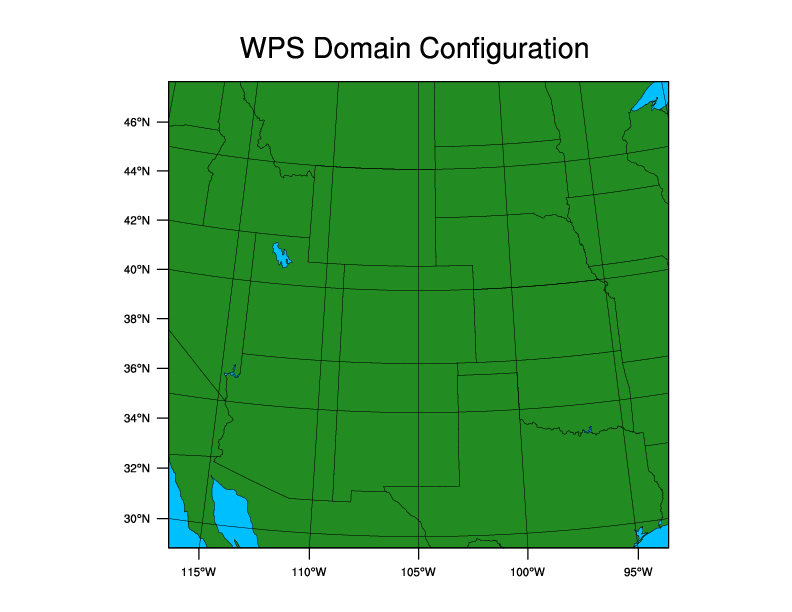
If you wish to take a look at the domain, you can run the "plotgrids.ncl" script by issuing:
ncl util/plotgrids.ncl
You should see the following plot appear on the screen:
To close the X11 display window, simply type 'ctrl-c'.
2.
Link the input data (using the "link_grid.csh" script), link the correct Vtable, and then run ungrib, as follows:
Move into the WRF/test/em_real directory, and link–in the met_em* files:
ln -sf ../../../WPS/met_em* .
Then run real.exe. This executable was built for parallel (distributed–memory) execution, so use the following command:
mpirun -np 1 ./real.exe
5.
From the same directory (as real.exe was run), run wrf.exe. This executable was also built for parallel execution, so use the following command, which runs WRF with 8 processors (CPUs):
mpirun -np 8 ./wrf.exe
6.
If you wish to take a look at your output, you can use ncview:
ncview wrfout_d01_*
Another option is to use either the NCL or RIP post-processing programs for plotting output. If you wish to learn about these prgrams, see NCL or RIP instructions from our WRF Online Tutorial.
7.
When you are done using your image, you must stop or terminate the run so that you will not continue to acrue charges for your computing time. For this tutorial, you will use the "STOP" method.
To stop the instance, click on the 'Actions' button at the top ->Instance State ->Stop.
If you are interested in trying to run some other WRF exercises, click here.
Go back to the "AWS Active Instances" page and find the instance you are using. Check the box on the left-hand side to 'select' your instance.
Click on the 'Actions' button at the top.
->Image ->Create Image
You'll be asked to give your image a name and a description. These are optional, but naming your AMI is recommended.
Click the blue 'Create Image' box in the lower right-hand corner.
A box will pop up that lets you know the request was submitted. From that box, there is a link available to allow you to view the pending request now. Note: It can take a few minutes for the image to be created. You will need to make sure the image creation is fully completed before deleting your current instance, or you risk losing your work. Once your image has been created, you can terminate your current instance. To do so, click on the 'Actions' button at the top ->Instance State ->Terminate.
You can view your AMI by clicking on the 'AMIs' tab in the left-hand side bar. Note: it may take several minutes for the AMI to be approved and ready to use. It will be listed as 'available' when it's ready.
By default, only you can see and use your AMI. If you'd like to make your AMI usable by others, you can modify the permissions to make it public, or available only to particular users, once the AMI is available.
When it is available, select the AMI, and then click on the 'Permissions' tab at the bottom to make modifications.
You can then share the AMI ID.
It will be necessary that the person using the AMI be in the same region as where the image was created (e.g., N. Virginia), in order to locate the image. Images are not shared between regions automatically. There are, however, ways to copy it to other regions, if necessary.
To see how to find/use someone else's AMI, follow the instructions in the section below for 'Using Workshop AMI.'
2.
Once you have an AMI created, you can come back later to use it with all the environment components saved.
From the AWS EC2 page, click on 'AMIs' in the left-hand side bar.
Select the image you would like to use, and then click 'Launch' at the top of the page.
Select your instance type, then click the blue 'Review and Launch' button at the bottom of the page.
Review your configuration and make sure everything looks okay, then click 'Launch.'
As you did when you created the original instance, you'll choose/create a key pair type. You can then 'ssh' into the instance, as before.